Tuesday, November 22, 2011

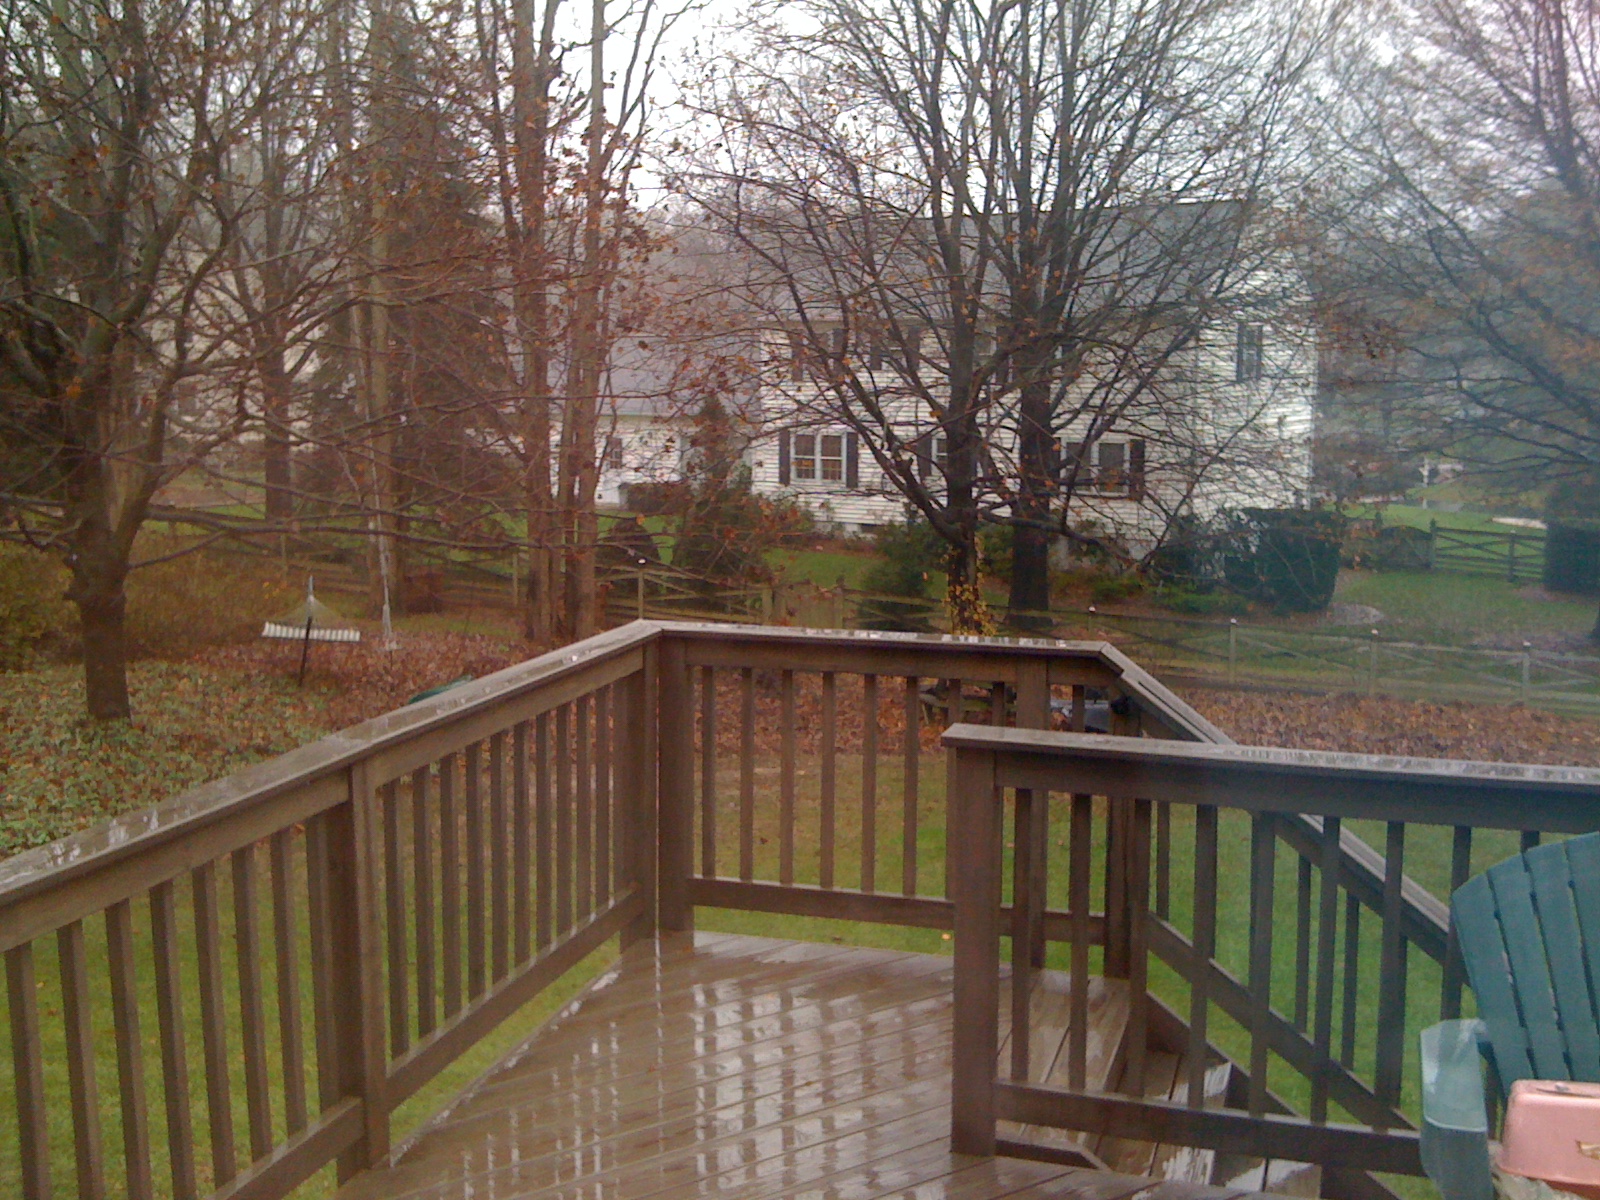
Leaf pile in the corner is roughly a 10 ft sided triangle and 3 feet high.


There is a good layer of leaves over all surfaces, I'd guess 3 to 6 inches.


The pile in the back is surrounding a fig tree to provide some winter protection.


The huge hole AKA as the "Baby Trap" long before David is currently filled to ground level. It will compact lower over the winter. Much of that is leaves.


More leaves in the mini forest area where my hammock is.
Posted by Picasa

David showing just a shadow of his little dimple!
Posted by Picasa

Saturday, October 29, 2011

Based on the recipe below I ventured into homemade pizza dough. I used 2 cups bread flour and 1 cup semolina flour. I used rapid rise yeast at 10 PM and left the dough in the refrigerator over night with a punch down in the AM and another at 4PM followed by room temperature rising and baking at 7.

I used the dough hook to kneed for 10 minutes (a compromise as I've read 20 elsewhere and here said 5). The window test totally failed.

The first rise was over double, the second less than 50%. The dough rolled out easily and was perfect for my 16 inch cast iron pizza pan.

Baked at 450 for about 15 or 20 minutes...I lost track.

Used 1/4 pound thin sliced mozzarella and 1/4 pound thin sliced pepparoni. Could have have had slightly thicker cheese, also could use some pre ground parmesan. Used 4 mod mushrooms sliced too thin, use 8 thicker next time, a hand full of the little "yummy" peppers slice and pre frozen and Contadina pizza sauce (full can) with added home grown and dried oregano.

Will experiment more. I think no semolina next time, more mushrooms and cheese.


From ochef.com

California-Style Pizza Dough

From James McNair's New Pizza (Canada, UK), by James McNair.

Over the years, I have tried countless versions of pizza dough, yet I've never found one that I like as much as this version that I developed for my first pizza book in the 1980s. It has undergone a few refinements since then, but the basic recipe stands. The olive oil imparts a subtle flavor and richness and the crust bakes up tender yet chewy.

Ingredients:

1 cup warm water (110°F 115 °F; 43°C to 46°C)
2-1/4 teaspoons (1 packet or 1/4 ounce) active dry yeast
About 3-1/4 cups unbleached all-purpose, broad, or semolina flour
1 teaspoon salt
1/4 cup olive oil, preferably extra-virgin

Instructions:

Pour the warm water into a small bowl. Sprinkle the yeast over the water, stir to dissolve, and set aside.

To mix and knead the dough by hand:

In a large mixing bowl, combine 3 cups of the flour with the salt. Make a well in the center of the flour mixture, then pour in the yeast mixture and the 1/4 cup oil. Using a wooden spoon, vigorously stir the flour mixture into the well, beginning in the center and working toward the sides of the bowl, until the flour mixture is incorporated and the soft dough just begins to hold together.

Turn the dough out onto a lightly floured surface. Dust your hands with flour and knead the dough gently, pressing down on the dough with the heels of your hands and pushing it away from you, then partially folding it back over itself. Shift it a quarter turn and repeat the procedure. While kneading, very gradually add just enough of the remaining 1/4 cup flour until the dough is no longer too sticky; this should take about 5 minutes. As you work, use a dough scraper to pry up any bits of dough that stick to the work surface. Continue kneading until the dough is smooth, elastic, and shiny, 10 to 15 minutes longer. Knead the dough only until it feels smooth and springy but still slightly moist. Too much kneading overdevelops the gluten in the flour and results in a tough crust.

To mix and knead the dough with a food processor:

In the processor bowl, combine 3 cups of the flour with the salt and process to mix well, about 5 seconds. Add the yeast mixture and the 1/4 cup oil and process continuously until the dough forms a single ball or several masses on top of the blade, about 30 seconds. Pinch off a piece of dough and feel it. If it is too sticky, continue processing while gradually adding just enough of the remaining 1/4 cup flour for the dough to lose most of its stickiness. If the dough is dry and crumbly, add warm water, a tablespoon at a time, and process until the dough is no longer too dry. Turn the dough out onto a lightly floured surface and knead by hand as described in the previous paragraph for about 2 minutes.

To mix and knead the dough with a heavy-duty stand mixer:

In the mixer bowl, combine 3 cups of the flour with the salt. Attach the flat beater and mix well at the lowest speed for about 10 seconds. Add the yeast mixture and the 1/4 cup oil and mix well at the lowest speed for about 1 minute. Replace the flat beater with the dough hook and knead at medium speed until the dough is smooth and elastic, about 5 minutes. (After about 3 minutes, pinch off a piece of dough and feel it. If it is too sticky, continue kneading while gradually adding just enough of the remaining 1/4 cup flour for the dough to lose most of its stickiness. If the dough is dry and crumbly, continue kneading while gradually adding warm water, about a tablespoon at a time, until the dough is no longer too dry.)

To mix and knead the dough in a bread machine:

In the mixing compartment, combine the ingredients in the order suggested in the manufacturer's manual. Run the machine as directed in the manual.

After mixing and kneading the dough by one of the preceding methods, using a pastry brush, generously grease a large bowl with oil. Shape the dough into a smooth ball by stretching the outer surface smooth and tucking the sides of the dough underneath the bottom of the ball. Place the ball, smooth top down, in the bowl, turn to coat the ball all over with oil, and rest it seam-side down in the bowl. Cover the bowl tightly with plastic wrap to prevent moisture loss and set aside in a draft-free warm place for the dough to rise until doubled in bulk, about 1 hour and 10 minutes if using quick-rising yeast or about 1-1/2 hours if using regular yeast.

Alternatively, transfer the bowl of dough to a refrigerator and let rise for 1 hour, then uncover and use your fist to punch the dough down gently to expel air. Cover tightly, return to the refrigerator, and let rise for up to 24 hours, punching down 1 or 2 more times during the rise.

When the dough has doubled in bulk, use your fist to punch it down gently to prevent over-rising. If you are using bread flour or semolina flour, turn the room temperature-risen dough in an oiled bowl to coat once more, cover the bowl tightly with plastic wrap, and set aside in a draft-free warm place until the dough is once again doubled in bulk, about 45 minutes if using quick-rising yeast or about 1 hour if using regular yeast (omit this step if using all-purpose flour). If you cannot bake the dough risen at room temperature within 2 hours of its rising, punch the dough down again, turn it in an oiled bowl to coat once more, cover the bowl tightly with plastic wrap, and refrigerate. (The dough can be punched down a total of 4 times and kept refrigerated for up to 36 hours before the yeast is exhausted and the dough unusable.) Let chilled dough come to room temperature before proceeding.

Leave the dough whole for a large pizza, or divide it into 2 equal pieces for two pizzas, 4 equal pieces for individual pizzas, or 8 equal pieces for appetizer-sized pizzette. Form each piece of dough into a smooth ball in the same manner as the original large ball. If you wish to freeze dough for later use, wrap the pieces tightly in plastic wrap or seal in airtight plastic containers or freezer bags and freeze for up to 4 months. Before using, thaw in a refrigerator for 1 or 2 days or for a few hours at room temperature.

Yield: Makes enough dough for one 16-inch round pizza, two 12-inch round pizzas, four 8-inch round individual pizzas, or eight 4-inch round appetizer-sized pizzette; for 8 servings

Monday, October 24, 2011

Donna Gwyer made this lovely quilt!


Julie's mom pulled off this wonderful shower!


Posted by Picasa
Mary Ann made the cutest decorations too.


Since it was a couples shower Joey even got some how to lessons from another Dad.

Julie will be keeping David close!
Posted by Picasa

Sunday, October 23, 2011

My son Joey and his wife Julie are expecting our first grandchild any day now. We know he is a boy and they plan to name him David Browning D'Anna. I can't wait to meet the little love.
Posted by Picasa
Meanwhile, mom and dad are getting in a little practice time.

Posted by Picasa

Posted by Picasa

Panther

Posted by PicasaMy OLD kitty, Panther

The Big Project, an update for this year

It's a rainy day here in Maryland, yet again, but it is a drizzle and temperature is nice enough for shorts. I've spent it planting bulbs with my new bulb auger which is a wonderful tool and makes things much easier. I've also potted up so bits of DNA pilfered from here and there and sat several times to watch the birds at the feeders and rest.

Have I mentioned that the Big Project (vegetable garden with raised beds in a medium to large mammal proof fence) is going great? Well, short of the dang stink bugs it is. Lovely soil, effective fence and brain finally wrapped around 3 season planting and crop rotations thanks to the help of growveg.com.

When my kids built me the fence they also ran power to the shed and water. DH just hooked up the electric (15 volt max) so I have a light and a plug place. The water still must be turned on at the house but I can run it out of a hose that stays inside the fence.

Posted by Picasa


Other sub projects to come:
Build even more raised beds inside the fence (about 1/2 complete)
Box in a Freecycle double sink within the fence for washing up and potting
Set up a soaker hose system for each raised bed
Continue planting flowers on 3 sides of the fence (4th side is the shed)

In the rest of the yard my biggest new project is to plant liriope under my deck to stop the constant erosion.

This has been a great gardening year for me thanks to much help from family.Posted by Picasa

Beekeeping

Yesterday I attended a one day introduction to beekeeping seminar designed to help one decide if this is something one wants to do and to know enough to put in orders and obtain needed supplies so one is ready to open operations in April if the answer is yes. My answer is very likely yes. This is the wonderful group I have joined:
http://www.howardcountybeekeepers.org/


I am fond of insects in general but especially fond of pollinators. I'm a gardener who uses Integrated Pest Management. I'm retired and looking for new interests. I'm one of those crazies who pet bees. Honey bees often do better in garden apiaries than they do in the commercial, migratory operations. The group that put on this presentation was full of funny, bright and personable people. I joined the club today. They have an equipment loan program for members for the honey extractors. They hook new-BEEs up with a mentor who will work with the newbie one on one while installing bees in their first hive and while doing the first hive inspection. My county recently cleared up zoning questions leaving it clear I am unencumbered in that way. I'm told the nectar flow is good in Maryland and our disease problems are manageable. Importantly too, DH doesn't seem to object.

One of my concerns is the weight of the hives as they must be moved in order to inspect the colony. I was happy to learn there are options that reduce the weight of each element. The hive bodies come in 3 sizes as far as height goes and 2 sizes as far as the number of frames go. I will likely limit my sizes to medium boxes for brood and shallow boxes for honey storage. I will also go with 8 frames per box instead of 10.

The investment is not trivial. The hive itself, the workers and the queen, the protection gear for inspection and working the hive and misc. items like smokers and "hive tools". Still, it is less than many pets and way less than therapy. I will take another course 2.5 hours one day a week for 6 weeks, called "The Short Course" this winter and go to monthly meetings meanwhile. For now I'll review my notes, start reading, and Google a bunch of things I noted for that purpose today.

I really like having a new subject to study.

Monday, October 3, 2011

Dairy Free Pancakes

From :   http://dairyfreecooking.about.com/od/pancakeswaffles/r/basicpancakes.htm
Any changes I made noted with ( ... ).

Makes 8 large pancakes

Prep Time: 10 minutes

Cook Time: 10 minutes

Total Time: 20 minutes

Ingredients:

  • 1 cup all-purpose flour
  • 3 T. sugar
  • 2 t. baking powder
  • ½ t. salt
  • 1 cup unsweetened plain almond milk or other non-dairy milk
  • 1 large whole egg, lightly beaten
  • 1 large egg yolk, lightly beaten    (I just used 2 whole eggs and it was fine)
  • 1 ½ t. canola oil 
  • (I added frozen blueberries after pouring the batter and it worked well)

Preparation:

1. In a medium-sized mixing bowl, sift together the flour, sugar, baking powder and salt, making a well in the center.
2. In a separate bowl, whisk together the almond milk, whole egg, egg yolk and canola oil until well combined. Add to the well in the dry ingredients and mix until just combined. (Batter should still have some lumps.)
3. Lightly oil a heavy-bottomed skillet or griddle and heat over medium heat. Once hot, add the batter to the pan, about ¼ cup at a time, flipping when bubbles begin to form on the surface of the pancakes and the edges begin to rise. Cook the other side of the pancakes for about 1-2 minutes more, or until golden brown. Repeat until all of the batter is used, keeping the pancakes warm either on a plate beneath a towel or in a 200 F. oven. Serve with toppings of choice.

Friday, September 23, 2011

Creamy Rice Pudding (from allrecipees.com)(made without raisens)
 
recipe image
Rated: rating
Submitted By: Erica G.
Photo By: Gans
Prep Time: 25 Minutes
Cook Time: 20 Minutes
Ready In: 45 Minutes
Servings: 4
"Cooked rice is combined with milk, sugar, an egg and golden raisins, and flavored with butter and vanilla in this quick, stovetop rice pudding."
Ingredients:
3/4 cup uncooked white rice
2 cups milk, divided
1/3 cup white sugar
1/4 teaspoon salt
1 egg, beaten
2/3 cup golden raisins
1 tablespoon butter
1/2 teaspoon vanilla extract
Directions:
1. In a medium saucepan, bring 1 1/2 cups water to a boil. Add rice and stir. Reduce heat, cover and simmer for 20 minutes.
2. In another saucepan, combine 1 1/2 cups cooked rice, 1 1/2 cups milk, sugar and salt. Cook over medium heat until thick and creamy, 15 to 20 minutes. Stir in remaining 1/2 cup milk, beaten egg and raisins. Cook 2 minutes more, stirring constantly. Remove from heat, and stir in butter and vanilla. Serve warm.

Sunday, August 14, 2011

Tres Leches

http://www.foodnetwork.com/recipes/alton-brown/tres-leche-cake-recipe/index.html

Tres Leches

This yummy, dense, hot milk cake (leche uno) is soaked in a vanilla milk sauce/thin pudding/thin custard made from combinations/permutations of sweetened evaporated milk, sweetened condensed milk, and/or sweetened heavy cream (leche dos) and covered in whipped cream or yup!cool whip "leche" tres). The cake and the soaking cream are usually heavily flavored with vanilla. Recipes for Tres Leches vary almost as much as the "we made it first" claims. All that can definitively said is it is widely popular. One possible theory for the general confusion about origin may be that it originated as a promotional recipe once distributed in many areas of Latin America, perhaps on cans of evaporated milk.

Nope, I don't have a recipe of my own so I won't cut and paste one of the many available on the web. There is no family tradition. I just read about this cake somewhere and had tried it many times when eating out before I ran into Alton Brown's version here. It isn't classic as it is not a hot milk cake base but it is very good.

Tres Leches is now my go to recipe for pot luck dinners.

I recommend you try Tres Leches next time you're eating in your favorite Cuban,Puerto Rican, Salvadorean or Nicaraguan restaurant or google "tres leches recipe" or try Alton Brown's version like I did and make it for yourself.


Alton Brown's version fits my pan perfectly which in turn fits perfectly into a cooler. I don't know if I want to rock the boat but next time I may use my mother in law's recipe (below) for hot milk cake and bake both layers together in the same 9 by 13 inch pan.

ROSE's HOT MILK CAKE:
Pre-heat oven to 325 degrees.

Grease and flour - 2 cake pans (8 or 9 " / round or square are fine).

Rose's Hot Milk Cake (also called sponge cake). Good with bittersweet chocolate icing (with or without vanilla pudding in cut layers), butter cream icing, or a base for strawberry shortcake (ice with whipped cream and berries). Rose also used to ice half the cake in butter cream and half in bittersweet chocolate icing. It is also good just plain with no icing, with ice cream or Jae's variation of cinnamon sugar sprinkled on top before baking.

Cream together - 2 cups sugar, 4 eggs, 1 teaspoon pure vanilla extract plus a pinch of salt.

Warm together - 1/4 pound butter and 1 cup milk (skim is fine) just until butter is melted.

Mix in a separate bowl - 2 cups un-sifted flour, 1 teaspoon baking powder.

Add the flour mix then the milk mix to the egg mix in 3 alternating batches. Start with flour and end with milk.

Do NOT over beat (just enough to combine) and be quick. The baking powder activates quickly.

Pour into the 2 pans. Rap pan sharply on the counter to remove major air bubbles. Place in oven immediately.

Bake 1 hour or until golden brown and/or a toothpick inserted comes out clean. May need to rotate pans half way through cooking if your oven temperature is not staple.

Turn out of pan immediately and cool completely on cake rack before icing.

If desired cut each cake layer in half horizontally using dental floss. It may help to cut the corners on the starting side first with a serrated knife. This anchors the floss and prevents smashing the corners in.

Sunday, May 29, 2011

Tuesday, April 12, 2011

I made candied ginger yesterday following Alton Brown's instructions. It was perfect.

Today I'm using the left over water from simmering the ginger to make a ginger simple syrup. 3 cups "juice", 1.5 cups white sugar and 1.5 cups dark brown sugar simmered with 1.5 Tablespoons black pepper corns. I put this together from a bunch of googled sources.

Candied Ginger
From http://www.foodnetwork.com/recipes/alton-brown/candied-ginger-recipe/index.html

Follow his instructions exactly...put instead of 20 minutes it took 40 minutes for the sugar to recrystalize for me. I also saved the extra water plus made more by boiling the peelings. Oh, and before I weighed the ginger I drained it then put it in the salad spinner to get rid of more water. You'll understand more after reading the recipe. Comments are also mildly useful. Do stick close, do stir a lot. It does go really fast at the end so have your racks set up ahead of time. I sliced by hand.

They seem like they will dry quickly. This technique might do great for citrus rinds as well with maybe several pre boils.

At the start when you pile on the weighed sugar and just .25 cups of liquid it seems like it is impossible but when put on the heat it all melts and forms a syrup.

Follow his measurements exactly.
after peeling I had .75 pound of ginger.

Sunday, February 27, 2011

Happy despite myself

I am a bit laid up as of late. I had elective surgery for hammertoes on 2/7 and really fucked it up when I walked with the stupid boot off. I stubbed my toe and suddenly found myself in for no longer elective surgery...this time with a bone graft from my heel. I'm total non weight bearing for at least 2 weeks. Argg and it is spring outside. So much planning of gardening to be done. My house is full of walkers, crutchs and rollabouts as I try to learn to cope with this restriction.

Happy other news that is not mine to share yet but just know, random giggling is not a sign of pyschosis for me. I'm just very happy despite the above issue. VERY happy. More later on that topic. Smiles.

It is so gorgeous here today. I am enjoying open window time. My nice neighbor Brian moved a heavy garden chair for me to sit on just off the front porch and my friend Sue brought my winch cleaning supplies to the deck for me. The Wenches' Winch Cleaning Crew continues this year and the boats will be splashed into the river/bay soon so I need to get my part done while the weather is so fine.

Carla

Thursday, January 27, 2011

reseaching Aebleskiver OR Ebelskiver Or Æbleskiver (Danish Pancakes) and other things to cook in that pan

Here is the first recipee I made: (the words are all copied, not mine)

recipe for Danish Aebelskiver:

4 eggs, seperated
1 tsp. salt
2 c. buttermilk
1 T. sugar
2 c. flour
1/2 tsp. vanilla
4 tsp. baking powder
2 T. cooking oil
1/2 tsp. baking soda

Beat egg yolks slightly, add buttermilk. Mix dry ingredients and add yolks and buttermilk. Just before cooking, fold in stiffly-beated egg whites. Put in 1/2 tsp oil in each hole of hot aebelskiver pan before adding batter to pan. Turn when top bubbles. Pieces of prune or apple add to the flavor.

This is (in my opinion) the best recipe for Danish Aebelskiver I have eaten. It is from a friend whose family came from Denmark and lived in Elk Horn, Iowa until he died a few years ago. You will love them.
I did a half recipe and it made 19..
I used ¼ tesaspoon butter in each hole.
Started on 7 on left front burner then down to 5.

from:
http://www.rachaelrayshow.com/club/board/thread/17760/ Comments thread after the Rachael Ray show in 2008

---------------------


OTHER IDEAS
add cardomon
or cinnamon and nutmeg
serve with applesause
serve with whipped cream (can be flavored)
dust with powder sugar or cinnamon sugar
make with milk / buttermilk / ricotta / yeast
can whip or not whip egg whites
butter in mix or not
butter, bacon fat or pam on pan

---------------

http://www.twentymile.com/Cookbook/aebleskiver.htm

Preparation: 45 minutes Life Experience Recipe
Serves 4 to 6 persons Tom Galloway, adapted ...from Danish Kitchens
Ingredients:
2 cups butter milk
2 cups all-purpose flour
3 whole eggs, separated
4 tablespoons sugar, divided
½ teaspoon cardamom
½ teaspoon salt
1 teaspoon baking soda
1 teaspoon baking powder
1 tart apple
Bacon fat, for frying

-------------------
THIS IS THE SECOND VERSION I MADE
NO BUTTERMILK VERSION

INGREDIENTS
BATTER
1 cup flour
2 tablespoons white sugar
2 1/2 teaspoons baking powder
1/2 teaspoon salt
1/4 teaspoon ground cinnamon
1 dash ground nutmeg
2 eggs, separated
3/4 cup milk
2 tablespoons butter, cut into tiny cubes
1 teaspoon vanilla extract

FILLING
water fried apples with sugar and cinnamon, cooked until tender. Also need to be dry so don't overdo the water.

DIRECTIONS
1.Beat egg whites until stiff.
2.Stir the flour, sugar, baking powder, salt, cinnamon, and nutmeg together in a large bowl; mix in the egg yolks, milk, and vanilla until just combined.
3.Fold beaten egg whites into batter.
4.Heat an aebleskiver pan over medium heat; place small cube of butter in each depression.
5.Pour the batter into each cup to about 1/2 full. Spoon dollop of filling into center of batter, push in slightly. Allow the batter to cook in the bottom of the cup 1 to 2 minutes until golden brown. Don't forget which cup you placed the batter in first, it's all about rotation! Use a long skewer to lift one edge and give it a 1/4 turn. The uncooked batter will spill over into the cup, and cook. Continue lifting and turning the edges until the batter is fully cooked into a golden brown ball. At final cooking round fill any empty depressions with water to prevent burning.

SERVE
With confectioners sugar and maple syrup

-------------------ANOTHER BUTTERMILK VERSION
Aebleskiver

2 eggs
2 cups buttermilk
2 cups all-purpose flour
1 tsp. vanilla
2 teaspoons baking powder
1/2 teaspoon fine sea salt
1/2 teaspoon baking soda
2 tablespoons sugar
1/4 cup melted unsalted butter
1 T melted or softened butter (for pan)

Separate the eggs and beat whites until stiff but not dry, and set aside. In another bowl, combine egg yolks, buttermilk, vanilla, flour, baking powder, salt, baking soda, sugar, and butter. Beat until smooth, and then fold in the egg whites. Heat an aebleskiver pan over medium heat and brush each depression with melted butter. Pour about 2 tablespoons of the batter into each cup, and, when bubbly around the edges, turn quickly with a long wooden skewer or toothpick, trying not to puncture the balls. Continue cooking, turning the ball to keep it from burning. You can also add half the batter to the pan, add a teaspoon of jam or fruit, then cover with remaining batter. Great with maple syrup.Enjoy!

------------------WATER AND EGG VERSION ----made this the 3rd time I tried them, used berry filling and served as bread for dinner, not too big a hit with hubby, thought it was too much like desert. Discussed making McGriddle Abelsekiver with Julie...bacon, maple syrup and apple.


Great-Grandma Hansen's Ableskiver Recipe.

This is a very easy version, and what's more, I have tried many recipes, and still like this the best:

4 Eggs
1/2 C. Water
1/2 C. Milk
1/2 tsp Salt
2 C. Flour
2 tsp. Baking Powder

Mix all ingredients together and fill ableskiver holes about 3/4 full of batter. When bubbly in the middle and slightly crisp on the edges use a fork to flip.

Confectioners' sugar for garnish


-----------------WILLIAMS SONOMA VERSIONS FOLLOW ------ APPLE

With a spoonful of spiced apple filling tucked inside and accompanied by maple whipped cream, these pancakes make a special treat for an autumn brunch.
Ingredients:
For the filling:
1 Tbs. unsalted butter
3 Tbs. firmly packed light brown sugar
3 Granny Smith apples, peeled and grated
1/8 tsp. ground ginger
1/8 tsp. ground cloves
1/8 tsp. freshly grated nutmeg
1/4 tsp. ground cinnamon
Juice of 1/2 lemon
For the maple whipped cream:
1 cup heavy cream
1/4 cup maple syrup
1/4 tsp. salt
For the filled-pancake batter:
1 3/4 cups all-purpose flour
3/4 tsp. baking soda
1 tsp. baking powder
1 1/2 Tbs. granulated sugar
1/2 tsp. salt
3 egg yolks
1 1/3 cups buttermilk
1/2 cup sour cream
5 egg whites

5 Tbs. unsalted butter, melted
1 Tbs. confectioners sugar
1/4 tsp. cinnamon
Directions:
To make the filling, in a fry pan over medium heat, cook the butter, brown sugar, apples, ginger, cloves, nutmeg, cinnamon and lemon juice, stirring frequently, for about 20 minutes. Drain off any liquid. Set aside.

To make the maple whipped cream, in the bowl of an electric mixer fitted with the whisk attachment, beat together the heavy cream, maple syrup and salt until soft peaks form. Cover and refrigerate until ready to use.

To make the filled-pancake batter, in a bowl, whisk together the flour, baking soda, baking powder, granulated sugar and salt. In another bowl, lightly whisk the egg yolks, then whisk in the buttermilk and sour cream. Whisk the egg yolk mixture into the flour mixture until well combined; the batter will be lumpy. Set aside.

In the bowl of an electric mixer fitted with the whisk attachment, beat the egg whites on high speed until stiff but not dry peaks form, 2 to 3 minutes. Using a rubber spatula, gently stir the whites into the batter in two additions.

Brush the wells of a filled-pancake pan with melted butter. Heat over medium heat until the butter bubbles. Pour 1 Tbs. batter into each well and cook for 2 minutes. Spoon 1/2 tsp. apple filling into the center of each pancake and top with 1 Tbs. batter. Cook until the bottoms are golden brown and crispy, about 2 minutes more. Using 2 skewers or toothpicks, flip the pancakes over and cook until golden and crispy, about 3 minutes more. Transfer the pancakes to a plate. Repeat with the remaining batter.

In a small bowl, combine the confectioners sugar and cinnamon and sprinkle on the pancakes. Serve with the maple whipped cream. Makes about 30.
Williams-Sonoma Kitchen.


-----------------DRY CHERRY

These light, fluffy pancakes, known as ebelskiver in Denmark, are filled with dried cherries that have been soaked in an orange juice-sugar syrup. The liquid is then reduced and drizzled over the pancakes just before serving.
Ingredients:
1 cup fresh orange juice
1/3 cup plus 1 1/2 Tbs. sugar
1 cup dried cherries, chopped
1 3/4 cups all-purpose flour
3/4 tsp. baking soda
1 tsp. baking powder
1/2 tsp. salt
Zest of 1/2 lemon
3 egg yolks, lightly whisked
1 1/3 cups buttermilk
3/4 cup ricotta cheese
5 egg whites, beaten to stiff peaks
5 Tbs. unsalted butter, melted
Directions:
In a small saucepan over medium-high heat, whisk together the orange juice and the 1/3 cup sugar. Heat until the mixture is just beginning to boil. Add the cherries, remove from the heat and let stand for 15 minutes. Pour through a fine-mesh sieve into a small saucepan, pressing on the cherries with the back of a spoon; reserve the cherries. Set the pan over medium heat and cook until the liquid is reduced to a syrup, 10 to 15 minutes. Set aside.

In a bowl, whisk together the flour, baking soda, baking powder, the 1 1/2 Tbs. sugar, the salt and lemon zest. In another bowl, whisk together the egg yolks, buttermilk and ricotta. Add the yolk mixture to the flour mixture and whisk until combined; the batter will be lumpy. Using a rubber spatula, gently stir in the egg whites in two additions.

Put 1/2 tsp. butter in each well of a filled-pancake pan. Place over medium heat and heat until the butter begins to bubble. Pour 1 Tbs. batter into each well, add 1 compact tsp. cherries in the center of the batter and top with 1 Tbs. batter. Cook until the bottoms are golden brown and crispy, 3 to 5 minutes. Using 2 forks, flip the pancakes over and cook for 3 minutes more. Transfer to a plate. Repeat with the remaining batter and cherries.

Drizzle the pancakes with the orange-cherry syrup and serve immediately. Makes about 30.


-----------------CHERRY JAM


Filled with cherry jam and dusted with confectioners' sugar, our rich ricotta pancakes are sure to please the entire family. When spooning the jam into the pancakes, place it in the center of the batter to ensure the jam stays neatly tucked inside. The pancakes puff up considerably when cooking, so fill the wells with just the amount of batter specified in the recipe.

Kids will enjoy helping to prepare the pancakes. They can whisk all of the ingredients together. Then, after an adult carefully measures out the amount of batter and jam to go into each well, a child can spoon it into the pan.
Ingredients:
1 3/4 cups all-purpose flour
3/4 tsp. baking soda
1 tsp. baking powder
1 1/2 Tbs. granulated sugar
1/2 tsp. salt
Zest of 1/2 lemon
3 egg yolks
1 1/3 cups buttermilk
3/4 cup ricotta cheese
5 egg whites
4 Tbs. (1/2 stick) unsalted butter, melted
7 Tbs. cherry jam
Confectioners' sugar for garnish
Directions:
In a bowl, whisk together the flour, baking soda, baking powder, granulated sugar, salt and lemon zest. In another bowl, lightly whisk the egg yolks. Whisk in the buttermilk and ricotta. Whisk the egg yolk mixture into the flour mixture until well combined; the batter will be lumpy. Set aside.

In the bowl of an electric mixer fitted with the whisk attachment, beat the egg whites on high speed until stiff but not dry peaks form, 2 to 3 minutes. Using a rubber spatula, gently stir the whites into the batter in two additions.

Put 1/4 tsp. butter in each well of a filled-pancake pan. Place over medium heat and heat until the butter begins to bubble. Pour 1 Tbs. batter into each well. Place 1/2 heaping tsp. cherry jam in the center of the batter and top with 1 Tbs. batter. Cook until the bottoms are golden brown and crispy, 3 to 5 minutes. Using 2 skewers or toothpicks, flip the pancakes over and cook until golden and crispy, about 3 minutes more. Transfer to a plate. Repeat with the remaining batter.

Dust the pancakes with confectioners' sugar just before serving. Serve warm. Makes about 30.


-----------------CINNAMON BUN

With their fragrant cinnamon-sugar filling and drizzle of cream cheese frosting on top, these pancakes evoke all the sweet flavor and nostalgia of that bakery favorite: warm cinnamon buns. The pancakes make a comforting dish on cold winter mornings.
Ingredients:
For the cinnamon filling:
1/2 cup granulated sugar
2 Tbs. all-purpose flour
1 1/2 Tbs. ground cinnamon
1/4 tsp. salt
4 Tbs. (1/2 stick) unsalted butter, cut into 1/2-inch cubes,
at room temperature


For the cream cheese frosting:
3 oz. cream cheese, at room temperature
4 Tbs. (1/2 stick) unsalted butter, at room temperature
1 1/2 cups confectioners' sugar
3 to 4 Tbs. milk


For the pancakes:
2 cups all-purpose flour
1 tsp. baking powder
1/2 tsp. salt
1 Tbs. granulated sugar
4 eggs, separated
2 cups milk
4 Tbs. (1/2 stick) unsalted butter, melted, plus more for cooking
Directions:
To make the cinnamon filling, in a bowl, still together the granulated sugar, flour, cinnamon and salt. Add the butter and, using the back of a spoon, mash the butter into the flour mixture until all of it is absorbed into the butter, forming a paste. Set the cinnamon filling aside.

To make the cream cheese frosting, in the bowl of an electric mixer fitted with the flat beater, beat together the cream cheese and butter on medium speed until light and fluffy, 2 to 3 minutes. Add the confectioners' sugar, reduce the speed to low and beat until combined, 1 to 2 minutes, stopping the mixer occasionally to scrape down the sides of the bowl. Add 3 Tbs. of the milk and beat until combined, about 1 minute. The frosting should be thick but still pourable; add more milk if needed to thin it. Transfer the frosting to a small bowl; set aside.

To make the pancakes, in a bowl, whisk together the flour, baking powder, salt and granulated sugar. In another bowl, lightly whisk the egg yolks, then whisk in the milk and the 4 Tbs. melted butter. Whisk the egg yolk mixture into the flour mixture until well combined; the batter will be lumpy. Using an electric mixer fitted with the whisk attachment, beat the egg whites on high speed until stiff but not dry peaks form, 2 to 3 minutes. Using a rubber spatula, gently fold the whites into the batter in two additions.

Put 1/8 tsp. melted butter in each well of a filled-pancake pan. Set over medium heat and heat until the butter begins to bubble. Pour 1 Tbs. batter into each well. Spoon 1/2 tsp. of the cinnamon filling into the center of each pancake and top with 1 Tbs. batter. Cook until the bottoms are golden brown and crispy, about 3 minutes. Using 2 skewers, flip the pancakes over and cook until golden and crispy, about 3 minutes more. Transfer the pancakes to a plate. Repeat with the remaining batter and filling.

Drizzle the pancakes with the frosting and serve immediately. Makes 35 to 40.


-----------------BLUEBERRY

Ingredients:
1 3/4 cups all-purpose flour
3/4 tsp. baking soda
1 tsp. baking powder
1 1/2 Tbs. granulated sugar
1/2 tsp. salt
3 eggs, separated
1 3/4 cups buttermilk
4 Tbs. (1/2 stick) unsalted butter, melted
1 pint fresh blueberries
Confectioners' sugar for dusting
Maple syrup for serving
Directions:
In a bowl, whisk together the flour, baking soda, baking powder, granulated sugar and salt.

In a small bowl, lightly whisk together the egg yolks and buttermilk. Whisk the yolk mixture into the flour mixture until well combined; the batter will be lumpy.

In another bowl, using an electric mixer fitted with the whisk attachment, beat the egg whites on high speed until stiff but not dry peaks form, 2 to 3 minutes. Using a rubber spatula, gently fold the whites into the batter in two additions.

Put 1/2 tsp. butter in each well of a filled-pancake pan. Place over medium heat and heat until the butter begins to bubble. Pour 1 Tbs. batter into each well and cook until the bottoms are golden brown and crispy, 3 to 5 minutes. Put 5 or 6 blueberries in the center of each pancake and top with 1 Tbs. batter. Using 2 wooden skewers, flip the pancakes over and cook until golden and crispy, about 3 minutes more. Transfer to a plate. Repeat with the remaining batter and blueberries.

Dust the pancakes with confectioners' sugar and serve warm with maple syrup. Makes about 40.

-----------------CHOCOLATE

With a spoonful of rich chocolate ganache tucked inside, these pancakes are a special treat for a weekend brunch. Be sure the ganache is cold before placing it in the center of the pancakes; otherwise, it might seep out and burn on the pan sides. The pancakes puff up considerably, so dont overfill the wells.
Ingredients:
1 1/4 cups Williams-Sonoma hot chocolate
1/2 cup heavy cream
1 3/4 cups all-purpose flour
3/4 tsp. baking soda
1 tsp. baking powder
1 1/2 Tbs. granulated sugar
1/2 tsp. salt
3 egg yolks
1 1/3 cups buttermilk
1/2 cup sour cream
5 egg whites
5 Tbs. unsalted butter, melted
Confectioners’ sugar for dusting
Directions:
Put the chocolate in a small bowl.

In a small saucepan over medium-high heat, warm the cream until steam rises from the surface and bubbles form around the edges of the pan. Remove from the heat and immediately pour the cream over the chocolate. Stir until the chocolate melts and the ganache is smooth. Transfer 1/3 cup of the ganache to a separate small bowl and set aside at room temperature. Place the remaining ganache in the refrigerator until firm, about 1 hour.

In a bowl, whisk together the flour, baking soda, baking powder, granulated sugar and salt. Set aside.

In a small bowl, using a whisk, lightly beat the egg yolks. Whisk in the buttermilk and sour cream. Whisk the egg yolk mixture into the flour mixture until well combined; the mixture will be lumpy. Set aside.

In the bowl of an electric mixer fitted with the whisk attachment, beat the egg whites on high speed until stiff but not dry peaks form, 2 to 3 minutes. Using a rubber spatula, gently stir the whites into the batter in two additions.

Put 1/2 tsp. butter in each well of a filled-pancake pan. Place over medium heat and heat until the butter begins to bubble. Pour 1 Tbs. batter into each well and cook for about 2 minutes, then place 1/2 tsp. of the firm ganache in the center of each pancake. Top each with 1 Tbs. batter. Cook until the bottoms are golden brown and crispy, about 2 minutes more. Using 2 wooden skewers or toothpicks, turn the pancakes over and cook until golden and crispy, about 3 minutes more. Transfer to a plate. Repeat with the remaining batter and firm ganache.

Put the reserved ganache in the top pan of a double boiler set over but not touching simmering water in the bottom pan. Heat, stirring occasionally, until the ganache is warm and pourable.

Dust the pancakes with confectioners sugar and drizzle with the warm ganache. Makes about 30.


-----------------
Thai coconut rice pancakes, a street food...need more research, start here:
http://www.khiewchanta.com/archives/desserts/thai-mini-pancakes-kanoom-kran.html

-----------------
Vietnamese Sand Dollar Cakes (shrimp or pork with rice)
http://www.khmerkromrecipes.com/recipes/recipe539.html


Happy pancake is made on the stove top...we used a lid from a pot that fit somewhat snuggly over the top.....The "continue to cook until dry" just means that it's no longer liquidy on top ...when you steam it, it will begin to congeal and get firm...

we made the recipe somewhat different at the rest. i worked at. First, there was no coconut sauce, only the rice flour/coconut mix and we used shrimp cut horizontially (it still looked like a shrimp but there was only half of it.
The proceedure went like this:
Get yer pan hot (medium high heat) Add a couple drops of oil to each divet. Add 2-3 shrimp, depending on size to each. Cook until pink then pour in sauce. Clamp with lid and cook until no longer liquidy on top. Serve with fish sauce mix.

Second, we used horizontally halved shimp

-------------

http://lunchinabox.net/2007/06/27/making-takoyaki/ great technique tutorial on flipping Octopus balls

http://www.williams-sonoma.com/recipe/tip/making-filled-pancakes.html flipping tips

Monday, January 3, 2011

blueberry cake from same blog as before

Simple Blueberry Cake
January 23, 2008, 10:20 am Posted by maggiekowalczyk in General
Rating: Votes : 2
Click To Vote! | Post A Comment
- 3/4 cup melted butter - 1 1/2 cup all purpose bleached flour - 1 cup sugar - 4 large eggs - 2 teaspoons of baking powder - 2 cups blueberries Beat the eggs in with the sugar, then butter. Add baking powder to flour & mix in all together. Pour in pan, add blueberries on top. Bake untill darker golden

Polish obsessions again that I want to try

Aunt Kay's Rice Casserole
http://apolishkitchen.blogspot.com/

1 and 1/2 cups rice
5-6 Macintosh apples
1/4 cup milk, scalded
1/4 teaspoon, cinnamon
2 tablespoons melted butter
1/3 cups white sugar

Parboil rice about 6-7 minutes. Drain, rinse with cold water.

Peel apples and cut into slices.


Heat oven to 350 degrees.


Spray casserole dish with cooking spray. Start a first layer of apples, sprinkle with white sugar, and then a layer of rice. Drizzle 1 tablespoon melted butter over rice. Continue until you have 2 layers of rice and 3 layers of apples. Pour milk over layers. Sprinkle with cinnamon. Bake 45 to 60 minutes. Continue baking at 375 degrees for one hour.

http://apolishkitchen.blogspot.com/2010/11/adams-hunters-stew-bigos-12-pork.html#comments BIGOS

http://apolishkitchen.blogspot.com/2010/04/traditional-easter-soup.html#comments
Easter Soup

http://www.mycookingblog.com/post/1-maggiekowalczyk/14009/Polish-Bigos-Cabbage-stew-with-meat--kielbasa lunch meat bigos

http://www.mycookingblog.com/post/1-maggiekowalczyk/14007/Golabki-Cabbage-Rolls cabbage rolls